A guide to selecting a displacement sensor
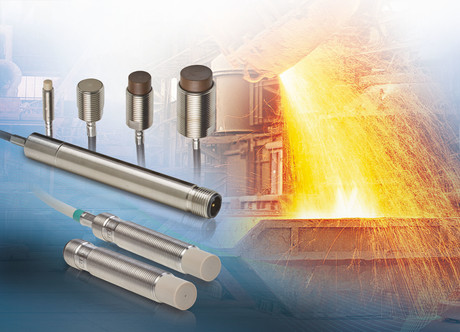
The advancements in Industry 4.0 demand high-speed operations and highly accurate outputs to ensure reliable quality assurance. Sensors are essential for the implementation of Industry 4.0 to provide accurate measurements of physical parameters, such as displacement and position for a variety of critical operations. Selecting suitable displacement sensors is an important decision, as it directly impacts the efficiency of these manufacturing and inspection processes.
In industrial applications, displacement sensors are commonly used for dimension measurement processes such as determining an object’s height, thickness, gaps, diameter and width. Due to the wide range of displacement sensors currently available, selecting an appropriate sensor is challenging and the choice may differ according to the application, required measuring range, frequency response, accuracy and environment.
Non-contact sensor technology makes it possible to achieve wear-free, fast, high-precision and reliable measurements of manufactured components and their measuring points. A non-contact measurement system is a decisive advantage in online measurement, particularly if the target is in a difficult-to-access area. The measurement data is generally available in real time and so can be used to automatically correct and control the production process.
In this article, some applications of displacement sensors are presented. We will briefly discuss different types of non-contact displacement sensors, such as laser triangulation sensors, confocal sensors, capacitive sensors, laser profile scanners and eddy current sensors, as well as some contact displacement sensors, along with respective applications. Understanding their applications and unique features under different conditions will assist the end user in selecting a suitable displacement sensor for the test and measurement application.
Displacement sensors: common applications
Measurements in multilayered or single-layered glass
The production of laminated glass, solar cells, flat screens and smartphone displays is challenging, as they consist of several layers and different transparent materials. When manufacturing multilayer, laminated and curved glass for aircraft, automotive and architectural applications, precise thickness measurement of each layer is important. If the curvature of the adjacent layers does not comply with the specifications, there is a risk of increased stress, which might lead to deficiencies or delamination of the glass. Also, due to the high cycle rates involved, the measurements must be performed quickly and precisely.
To measure the exact thickness of each layer and the air gap between those layers, confocal sensors are preferred. Due to the multipeak measurement function provided by the sensors, they are ideal for gap monitoring in safety glasses. Confocal sensors offer high-precision measurement systems based on confocal chromatic measurement technology. They are also compact, high speed and easy to integrate, ensuring the highest reliability in almost any measurement application where high precision is expected — from machine monitoring to fully automatic quality control of the final product.
Measurement of ferromagnetic and non-ferromagnetic objects
Large plants and machinery often rely on hydrostatic bearings that are continuously supplied with liquid lubricant via an external pressure supply. In this case, eddy current sensors are used, since they can ‘see through’ the lubricant and provide submicrometre position control. Eddy current sensors are also suitable for integration into such plants and machinery due to their compact and miniaturised design.
They can also perform exceptionally well in environments where high pressure and temperature, radiation, dirt and dust are expected. Eddy current sensors are also equipped with built-in temperature compensation to ensure high measurement accuracy when used for measurement under fluctuating temperatures.
Measurements of shiny and reflecting surfaces
Laser triangulation sensors offer the best performance for performing measurement where there are shiny and reflecting surfaces. Laser triangulation sensors have a small spot size, a large stand-off distance, a fast measuring rate and high precision as well as fast, advanced surface compensation features for measurement of difficult surfaces. The sensors continue to give flawless results even in the presence of surface reflections and are capable of switching between shiny and matt surfaces.
2D and 3D profile measurements
Laser profile scanners are based on the principle of laser triangulation to cater for increased demand for multidimensional measurement in quality control processes. These profile scanners are capable of detecting, measuring and evaluating the profiles on different object surfaces. While laser scanners are measuring the 2D profile, the third dimension can be generated by moving the laser scanner relative to the target object. Laser profile scanners are also equipped with real-time surface compensation features to enable smooth and reliable measurement even in constantly changing surface conditions, such as colour, shininess and light absorption.
One of the popular applications for laser profile scanners is laser deposition welding, in which these sensors are used to detect the contour of the object before the weld is deposited. The laser profile scanner detects the contour and profile and identifies the edge and boundary of the shape. The sensor can also be used to monitor the thickness of the coating during the welding process. Other applications include positioning of electronic components, gap measurement and thermal tests.
Measurements in research equipment
Research equipment can benefit from the use of a non-contact capacitive displacement sensor. An example is the particle accelerator at CERN (European Organization for Nuclear Research). Here, a capacitive hydrostatic levelling system is used to ensure that the pipes through which the particles are sent are at the same height, even when the concrete foundations of the pillars on which the pipes are mounted change their height due to natural soil movements. High-performance non-contact capacitive sensors provide outputs that are very linear, stable with temperature and able to resolve incredibly small changes in distance, resulting in high-resolution measurements of less than one nanometre.
Putting it all together
With high precision, high measurement speed, compact size, wear-free measurements and fast data processing, non-contact measurement technology offers many benefits. Users have a wide range to choose from, depending upon application requirements, such as higher resolution, robustness, temperature stability, linearity or special mounting and installation conditions.
Bestech Australia offers Micro-Epsilon sensors for special solutions and custom designs that are adapted to the customer’s specifications. Contact type sensors such as potentiometers, LVDTs and draw wires are also available.
Please visit our website to browse the wide range of our displacement sensors. Should you have any queries, our factory trained Application Engineers with specialised product knowledge will work with you to understand your requirements and recommend the right sensors for your application.
Trained for precision
Leuze uses AI to significantly improve the measurement accuracy of optical distance sensors for...
Turck launches next generation capacitive sensors
Besides detecting conventional objects, the BC/UC series can detect granulates or powders and...
ANS/ANM58 PROFINET: The absolute encoder generation for higher productivity
SICK has launched the ANS/ANM58 PROFINET, an absolute encoder generation specifically designed to...

